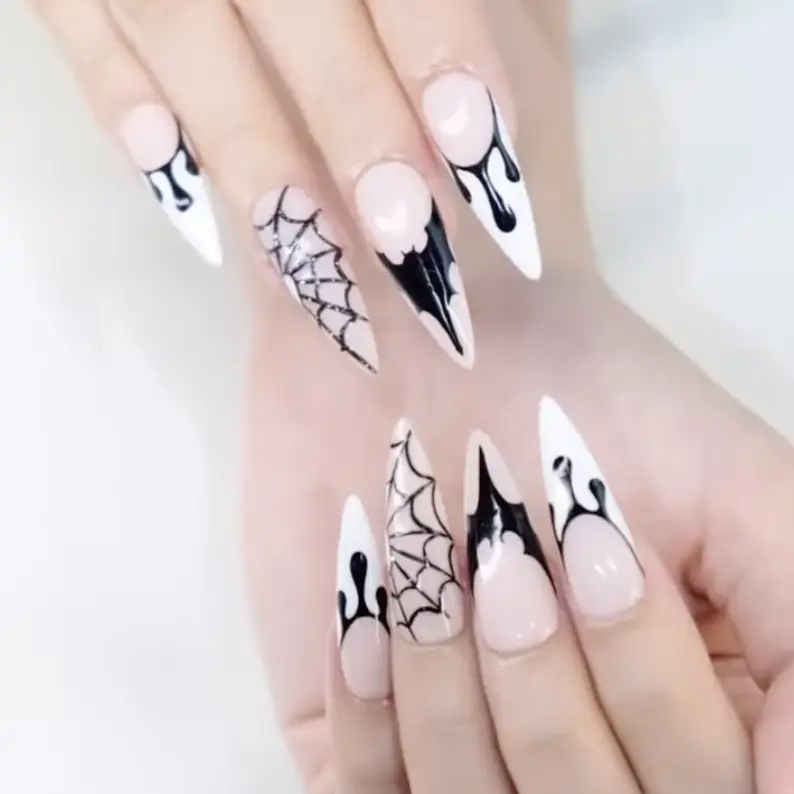
Ready to step up your nail game this Halloween? Gothic spider web nails are the ultimate way to embrace the spooky season with flair. This chic yet eerie design brings together elegance and creepiness—perfect for costumes, parties, or just a little festive fun! With only three iconic shades from Vdara10, you’ll create a killer look that’s surprisingly easy to achieve.
Let’s dive into this Gothic Spider Web Nails Tutorial and make your nails the talk of the season!
What You’ll Need
Here are the essential products you’ll need to craft this spooky yet stylish design:
-
- V009 Gentle Zephyr – A soft, neutral shade for a perfect base.
-
- Black Gel – For outlining the webs and adding that dramatic, gothic touch.
-
- White Gel – To create intricate web details and add depth to the design.
Step-by-Step Tutorial: Gothic Spider Web Nails
Step 1: Prep Your Nails
-
- Start with clean, dry nails. Shape and file them as desired, then push back your cuticles.
-
- Apply a thin layer of base coat to protect your nails and improve gel adhesion. Cure under an LED lamp as per instructions.
Step 2: Apply the Base Color
-
- Use V009 Gentle Zephyr to give your nails a subtle, neutral background that will make the web design pop.
-
- Apply two thin layers, curing each under an LED lamp. This creates a smooth base for the rest of the design.
Step 3: Create the Spider Web Outline
-
- With a fine detail brush, use Black Gel to draw thin, curved lines that radiate outward from one corner of the nail—this will serve as the framework for your web.
-
- Next, connect the lines with small arcs to complete the web pattern.
-
- Cure under the LED lamp to set the outline.
Step 4: Add Web Details with White Gel
-
- Use White Gel to carefully trace along the arcs of the web, creating additional highlights and dimension.
-
- This subtle contrast gives the web a spooky yet refined look.
-
- Cure again to lock in the details.
Step 5: Seal the Design with Top Coat
-
- Apply a glossy or matte top coat to protect your design and ensure it lasts throughout the spooky season.
-
- Cure one final time under the LED lamp.
Pro Tips for Perfect Gothic Spider Web Nails
-
- Keep a steady hand: For precise lines, rest your hand on a flat surface while drawing the webs.
-
- Experiment with finishes: Try a matte top coat for a velvety, gothic effect or go glossy for extra shine.
-
- Add embellishments: Elevate the design with small rhinestones or glitter accents for a glam Halloween twist.
Why You’ll Love This Look
-
- Easy yet impactful: With only three shades, you can create a salon-quality design at home.
-
- Perfect for Halloween: The gothic vibe and web details make it ideal for the spooky season.
-
- Versatile style: This design works great on any nail length or shape.
Final Thoughts
This Gothic Spider Web Nails Tutorial will give you a bold, spooky look with just three essential products from Vdara10: V009 Gentle Zephyr, Black Gel, and White Gel. Whether you’re heading to a Halloween party or just getting into the festive spirit, these nails are sure to impress.
So, grab your gels, follow the steps, and enjoy creating your eerie yet elegant masterpiece. Happy Halloween, and may your nails be as wicked as your spirit! 🎃🕸️
